
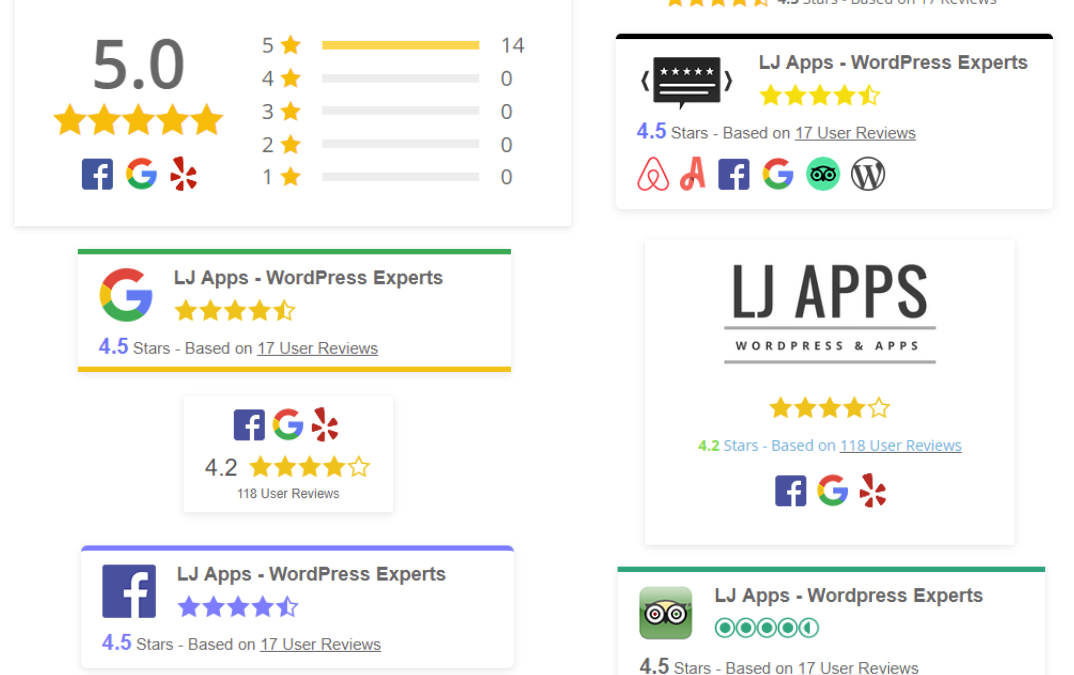
A Google review badge is a small block that shows your star rating and review count, usually with the Google logo, so visitors can see your reputation without leaving the page. In WP Review Slider Pro you build one once, drop a shortcode where you want it, and the numbers update automatically every time the plugin checks for new reviews.
This guide walks through creating a badge, picking the right style and sources, adding the shortcode to a page or widget, and turning the same badge into a floating badge that follows visitors around the site. If you are still comparing options, the Review Badges & Widgets feature page has the full list of what badges can do.
Before you start
- Connect Google first. Badges read from reviews you have already imported. If you have not connected your Google Business Profile yet, follow How to Set Up Google Reviews in WordPress and come back.
- Decide where the badge will live. A sidebar, footer, header bar, product page, or a floating corner badge all work. The steps are the same; only the last step changes.
- You do not need to style anything by hand. Every badge style has a live preview in the editor and uses your business name, average and total from the connected source.
Step 1: Create a new badge
In your WordPress dashboard go to WP Review Slider Pro → Display Reviews → Badges. Click Add New Badges Template. Each badge you create shows up in this list with its own ID and shortcode, so you can keep a Google badge, a Facebook badge, and a combined badge side by side.

Give the badge a title that describes where it will go, for example Sidebar Google Badge. The title is only shown in the admin, so make it useful for you.
Step 2: Pick a style and choose the reviews it counts
The top of the badge editor sets what the badge looks like and which reviews it summarizes.
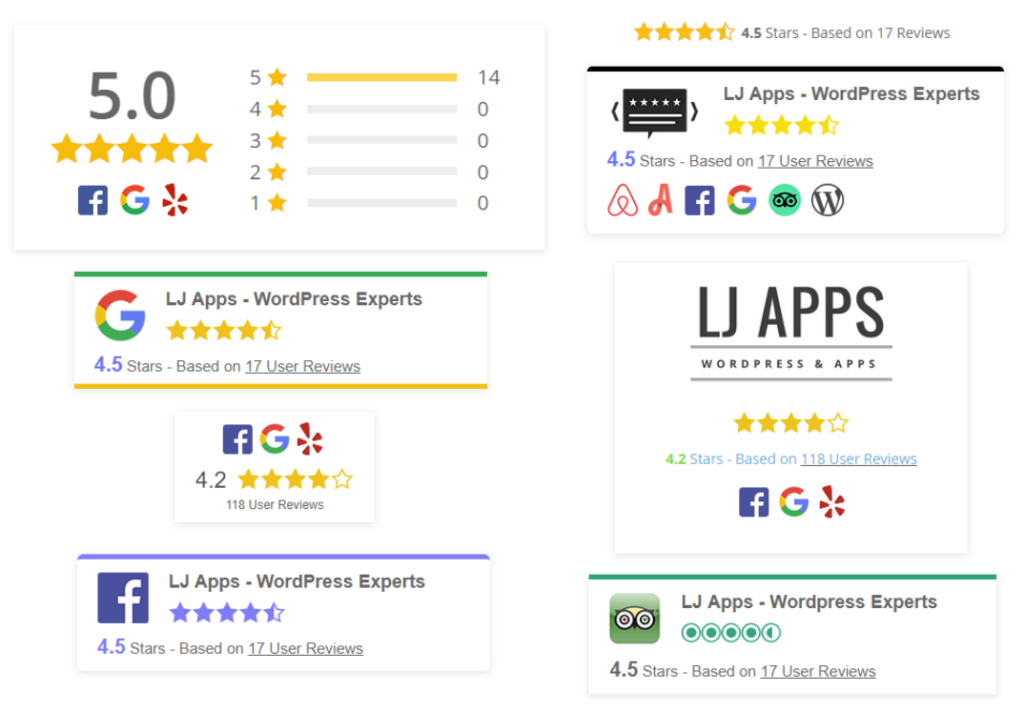
- Badge Style. Seven styles are built in, from a compact one-line rating to a full rating breakdown with bars for each star level. Style 1 is the classic Google look: logo, business name, stars, and “Based on X reviews”.
- Review Origin. Leave this on downloaded reviews for a normal Google badge. Choose Post ID when you want a badge on a product or location page that only counts the reviews tagged to that page, or Submitted for reviews collected with your own review form.
- Source Type. Pick Google for a Google-only badge. You can also tick more than one source to build a combined badge that shows one overall average across Google, Facebook, Yelp and the rest.
- Ratings From. Source Site shows the total and average Google reports for your listing. Review List calculates from the reviews stored in WordPress, which is what you want if you have filtered or hidden any reviews. Input lets you type the numbers yourself.
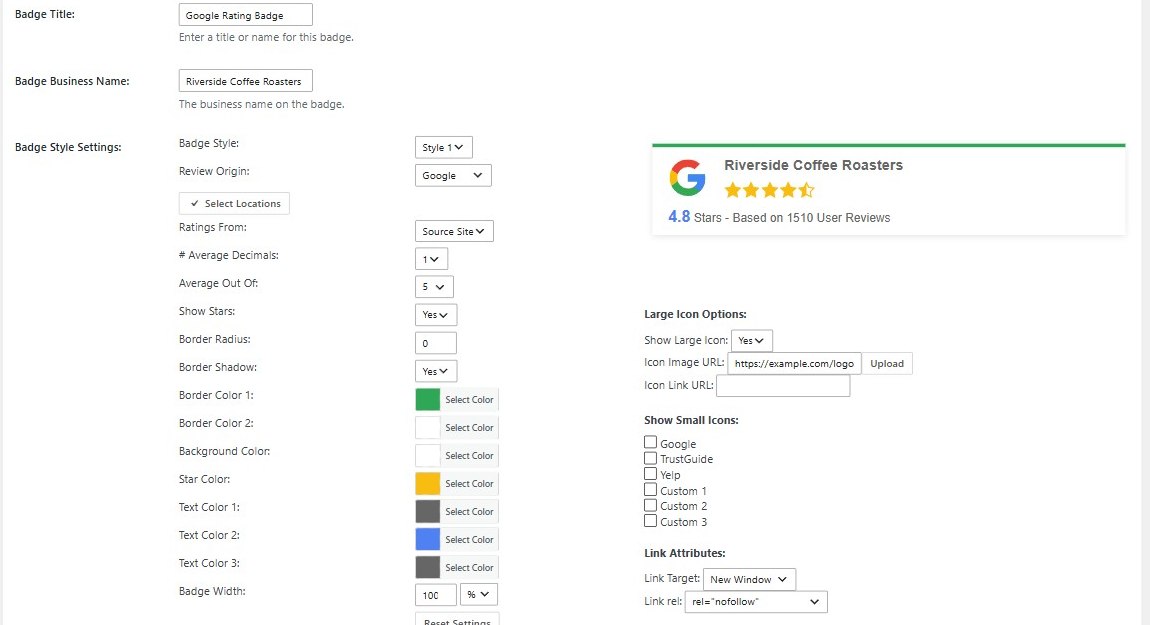
The preview on the right updates as you change settings. Google does not return the total number of reviews through its API for every listing, so if the count looks low switch Ratings From to Source Site, or choose Input and type the total in yourself.
Step 3: Set the icon, text and link
Below the style settings you control the small details that make the badge match your site.
- Badge Business Name is the name printed on the badge. Shorten it if your Google listing name is long.
- Large and small icons. Show one large Google logo, a row of small source icons, or neither. Each icon has an Icon Image URL you can swap for your own logo and an optional Link URL.
- Star Color and Text Colors have simple color pickers. The default dark text and gold stars work on light backgrounds; switch to white text for a dark footer.
- Link Target and rel let you open badge links in a new window and add nofollow if you prefer.
Step 4: Rich snippets and the click action
Two settings near the bottom of the editor deserve a closer look.
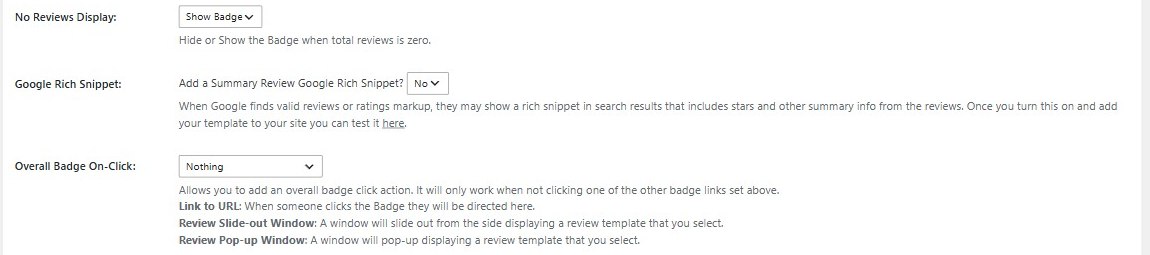
- No Reviews Display. Choose whether a brand new listing with zero reviews still shows the badge or hides it until the first review arrives. Hiding is the safer choice.
- Google Rich Snippet. Turning this on adds AggregateRating schema to the page the badge is on. Google only shows review stars in search results for certain page types, such as products, local businesses, and a few others, and never for a site’s own homepage or about page, so enable it on the pages where it is allowed and leave it off elsewhere. The plugin can map the entity to the current page or a specific post ID.
- Overall Badge On-Click. This decides what happens when a visitor clicks the badge: Nothing, Link to URL (for example your Google listing, in a new or the same window), Review Slide-out Window, or Review Pop-up Window. The last two open a review template you pick, so visitors can read the reviews without leaving the page.
Click Save. The badge is now in your list and ready to display.
Step 5: Add the badge to a page, post or widget
Back on the Badges list, click the How to Display button next to your badge. The pop-up shows the shortcode for that badge ID and PHP snippets for theme templates.
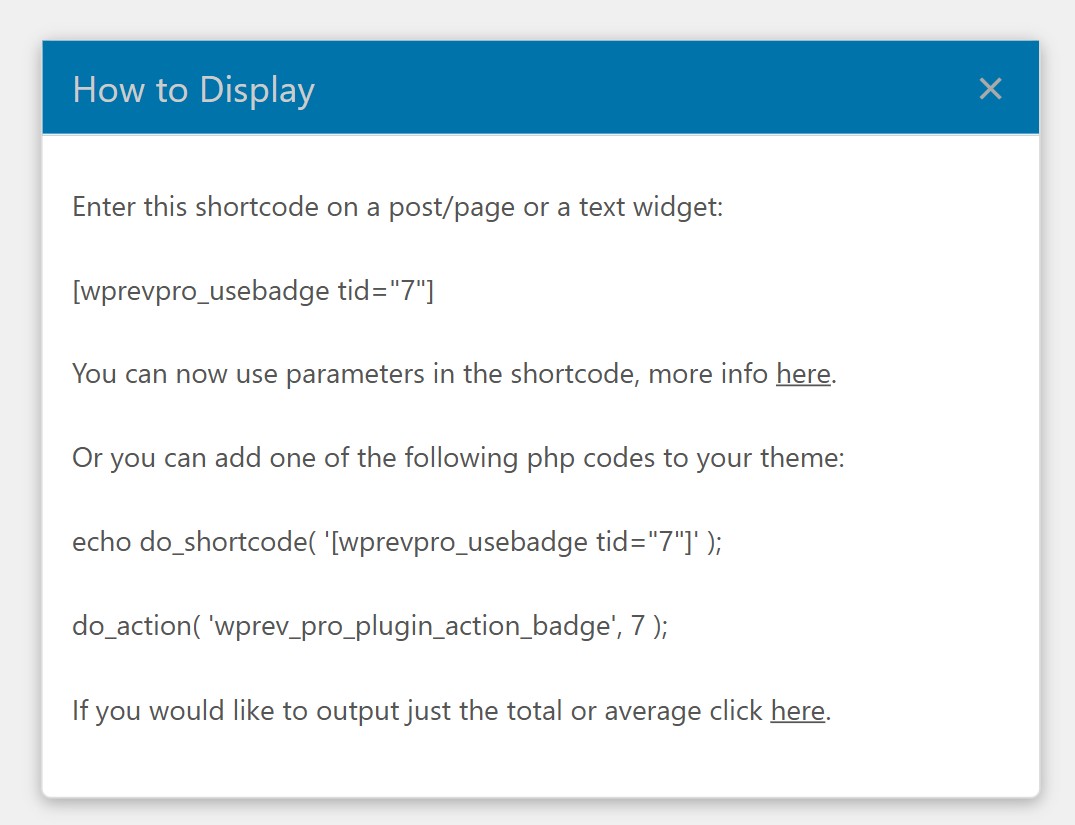
Paste the shortcode anywhere shortcodes work:
[[wprevpro_usebadge tid="7"]]- Block editor: add a Shortcode block, or type the shortcode directly in a Paragraph block.
- Widget areas: add the WP Review Slider Pro Widget to a sidebar or footer and select the badge from the dropdown, or use a plain Shortcode widget.
- Page builders: Elementor, Divi, Beaver Builder and WPBakery all have a shortcode or text module that renders it.
- Theme templates: use
echo do_shortcode( '[wprevpro_usebadge tid="7"]' );in header.php or footer.php to show the badge on every page.
Replace 7 with the ID of your own badge. If you only want the number, not the whole badge, the [wprevpro_totalavg] shortcode outputs just the total or average so you can write your own sentence around it.
Step 6: Make the badge float
A floating badge sits in a corner of the screen and stays visible as the visitor scrolls, which is the version most people picture when they think of a Google review badge. You can turn any saved badge into a float without rebuilding it.
Go to Display Reviews → Floats and click Add New. Set Float Type to Badge, pick the badge you just created from Choose Badge, and pick a position such as Bottom Right. You can show it on all pages or limit it to certain post types or page IDs, set a width, hide it on mobile, and optionally auto-close it after a delay.
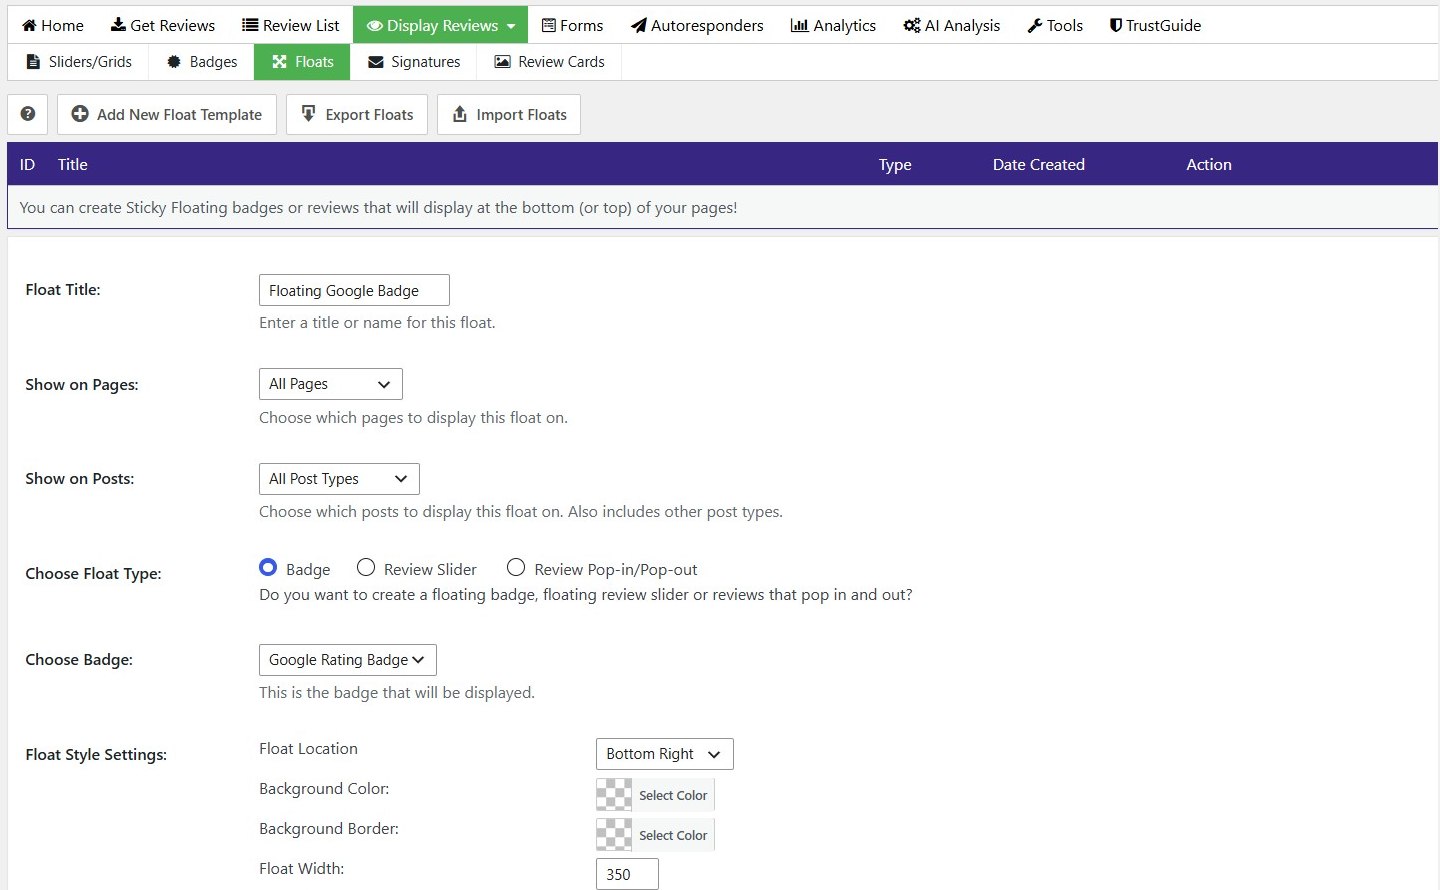
Save and the plugin adds the float automatically; no shortcode is needed. The on-click action you set on the badge still applies, so a click on the floating badge can open your reviews in a pop-up or send visitors to Google to leave their own.
Tips for a badge that actually helps
- Put it near a decision. Next to a Buy button, a booking form, or a contact form is where a rating does the most work.
- Use one combined badge if you have strong reviews on several sites. A single overall average with a higher count is more convincing than three small badges.
- Keep the numbers honest. The badge always uses your real average and count. If you hide a negative review in the plugin, set Ratings From to Review List so the badge matches what visitors can see.
- Pair it with a review page. Link the badge to a page that shows the full reviews with a review template so curious visitors can read them without leaving your site.
Frequently asked questions
Does the badge update automatically?
Yes. The badge reads from the reviews the plugin has imported. Each time the scheduled check for new reviews runs, the average and total in the badge change to match. There is nothing to edit by hand.
Can I show a badge for one location only?
Yes. Connect each location as its own Google source, then create a badge per location with only that source ticked. For a multi-location summary, create one more badge with all of them ticked.
Will the badge slow my site down?
No. The badge is rendered from data already stored in your WordPress database. There is no call to Google when a page loads.
Can I show a Facebook or Yelp badge the same way?
Yes. The steps are identical. Choose the source in Step 2 and the badge switches its logo and numbers to match. You can also combine sources into one badge.
Do I need the Pro version?
Badges, floating badges, and rich snippet schema are part of WP Review Slider Pro. The pricing page lists the Starter, Business and Agency licenses; every tier includes all features, badges included.
That is the whole process: create the badge, place the shortcode or set up a float, and let the plugin keep the numbers current. For more on styles, combined sources and the rating breakdown badge, see the Review Badges & Widgets feature page, or compare licenses on the WP Review Slider Pro pricing page.